
The Best Exercise You Can do for Running Efficiency
Apr 30, 2018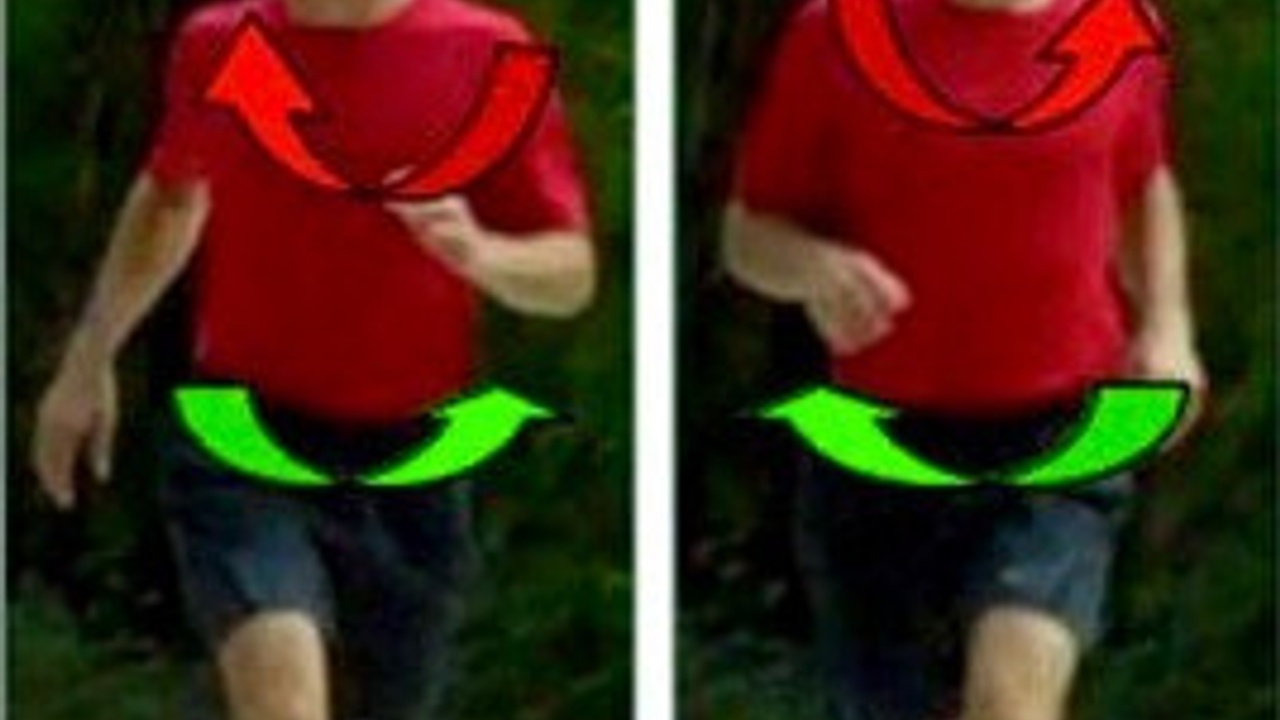
In last month’s blog, Improve Your Running Form: Align Your Core, I discussed the importance of aligning your core to allow for counter-rotation between the upper and lower body, specifically between the rib cage and the pelvis. Keep in mind that the hip sits within the pelvis and follows its rotation. When using good running form, your rib cage rotates in one direction, while the pelvis/hip rotates in the opposite direction. For instance, with the left leg forward, the pelvis/hip is rotated right and the rib cage is rotated left. Although this is how we are supposed to function when we run, as I mentioned last month, this is often not the reality. In most of the photos I perused to use on the blog, the runners had their pelvis/hip and rib cage rotated in the same direction.
As Gary Gray, physical therapist, athletic trainer and coach, says, we need to “LOAD TO EXPLODE.” If we are not rotating our pelvis/hip back and LOADING the muscles surrounding the hip joint, we are not able to EXPLODE with maximal power. When the pelvis/hip rotates back, these muscles are stretched and activated, creating potential energy that is released through a strong push-off into the next stride. If the pelvis/hip doesn’t rotate backwards enough to LOAD the hip joint muscles, you will not be able to EXPLODE forward.
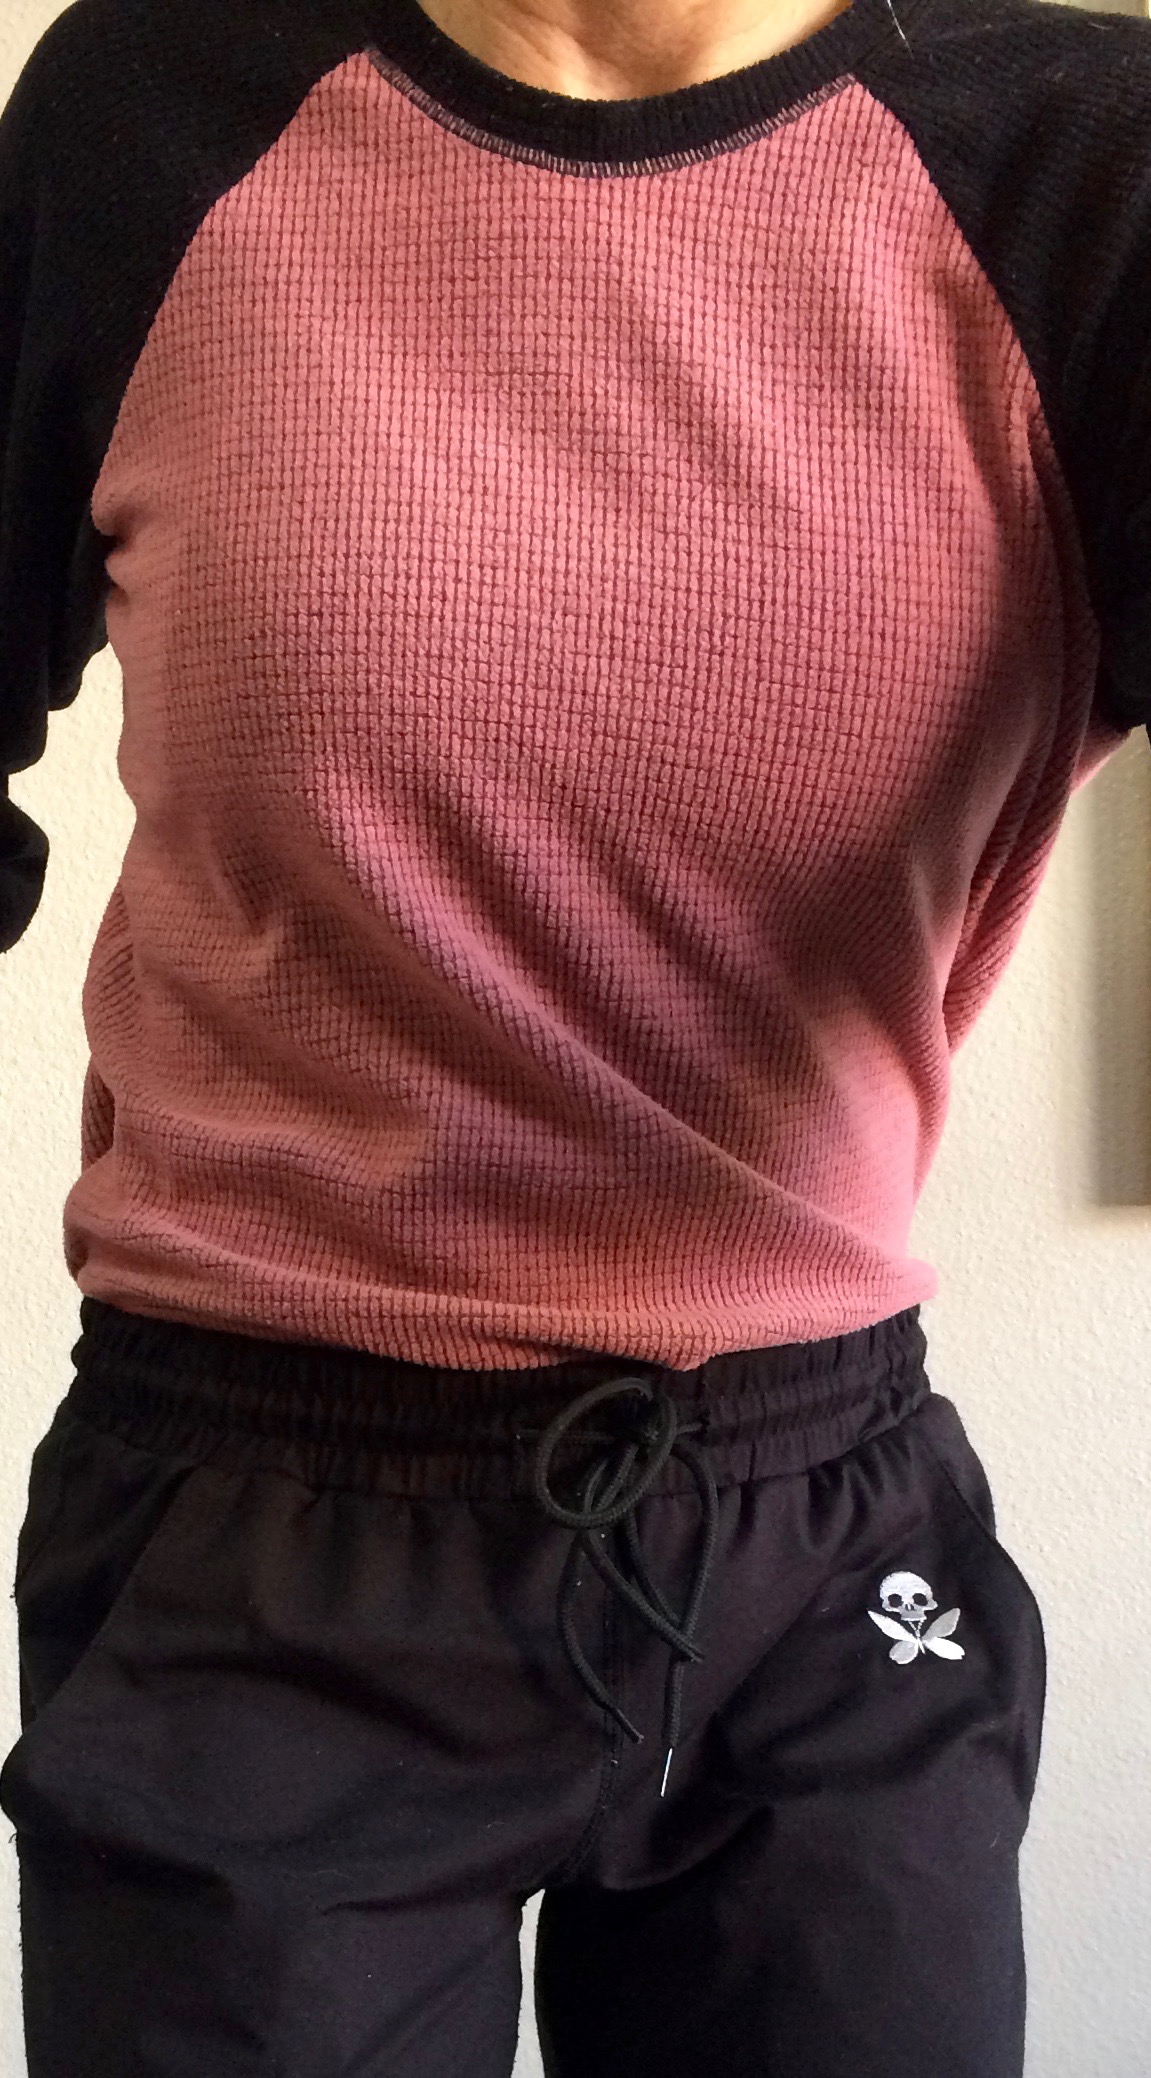
In this picture, my right leg is forward. Note that you can see opposite torso rotation, with the left pelvis/hip rotating back as the rib cage rotates right. Look at the creases in my shirt that are all converging down toward my left hip as it rotates behind the right. Also notice that the logo on the left side of my pants is behind the same spot on the right side of my pants. The tie on my waistband is also pointed to the left. There are no creases in the upper right side of my shirt, demonstrating that this is moving back and opening as the rib cage moves in that direction.
Exercise: One Leg Centering
The exercise is the position! Credit goes to the PRI Vision Center, Hruska Clinic and Postural Restoration Institute for teaching me this activity during my recovery. In the picture, I am centering myself on my left leg. Becoming strong, balanced and stable while centered on one leg at a time will allow you to LOAD and EXPLODE when you run.
I mentioned that when you rotate your pelvis/hip back, you stretch and activate your hip joint muscles. These muscles do not work alone! Rather, there is a chain of muscles on the leg that you are centering your body over (which is the left leg in the picture) that need to engage together for maximum efficiency. This chain includes:
- Hamstrings
- Adductor (Inner Thigh)
- Glutes (Glute Med)
- Abdominals (Transverse Abdominis and Internal Oblique)
Exercise Instructions:
- Stand with your legs hip-width (running-width) apart with your feet pointed straight ahead and a slight bend in your knees.
- Tuck your pelvis under to lengthen your lower back. This should also engage your abdominals to rotate the pelvis up in the front.
- Ensure that you are weighting your whole foot and have awareness of your heel and big toe on each side.
- Shift one knee ahead of the other without moving your feet. Conversely, you can think of shifting the opposite hip back.
- The knee that you bring forward bends more, and the one that you move back straightens slightly but does not lock out.
- This movement rotates your pelvis to point toward the straighter leg. This is the leg you are centering your body over. The center seam of your pants/shorts should be directed toward this leg.
- On the side you have shifted toward, you should feel tension in the chain of muscles mentioned: hamstring, adductor, glutes and abdominals. If you are having trouble feeling activation in any of these muscles, follow these steps:
- Hamstrings: pull back more into your heel.
- Adductors: bring your knee inward toward your centerline.
- Glutes: rotate the pelvis/hip back more.
- Abdominals: re-tuck your pelvis. You may also need to side-bend your torso slightly away from your body.
- Move your opposite arm back without letting the pelvis rotate.
- Breathe! In through your nose and out through your mouth. Hold the exhaled position for at least three seconds before your next inhale.
- Maintain your one leg centered position for five breaths.
- Repeat on both sides a minimum of three times.
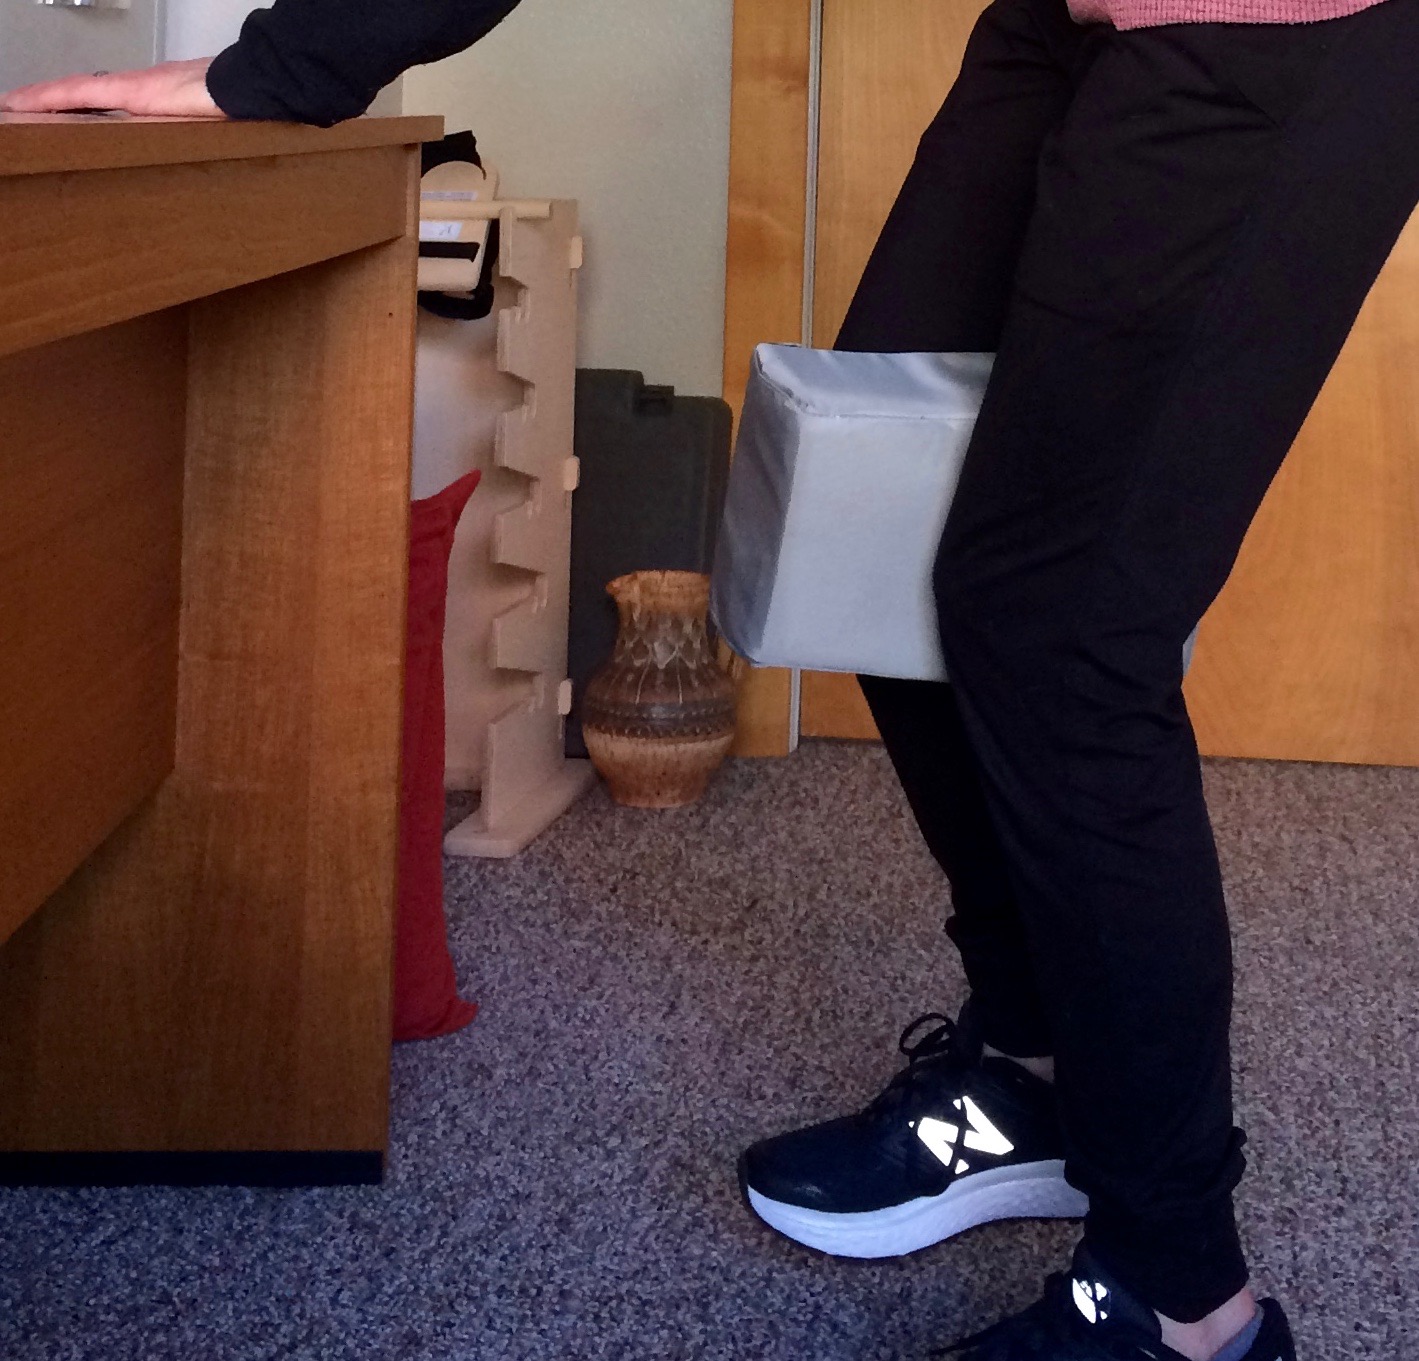
Exercise Regressions: Supported Centering
- Support yourself with a hand on a surface in front of you. In the photo above, you can see that I have my hand on the desk. This is a good way to steady your balance while you are trying to coordinate all the muscles working together and hold the position.
- Put your back on the wall so that you are supported from behind.
- Hold a stick or ski pole in your forward hand.
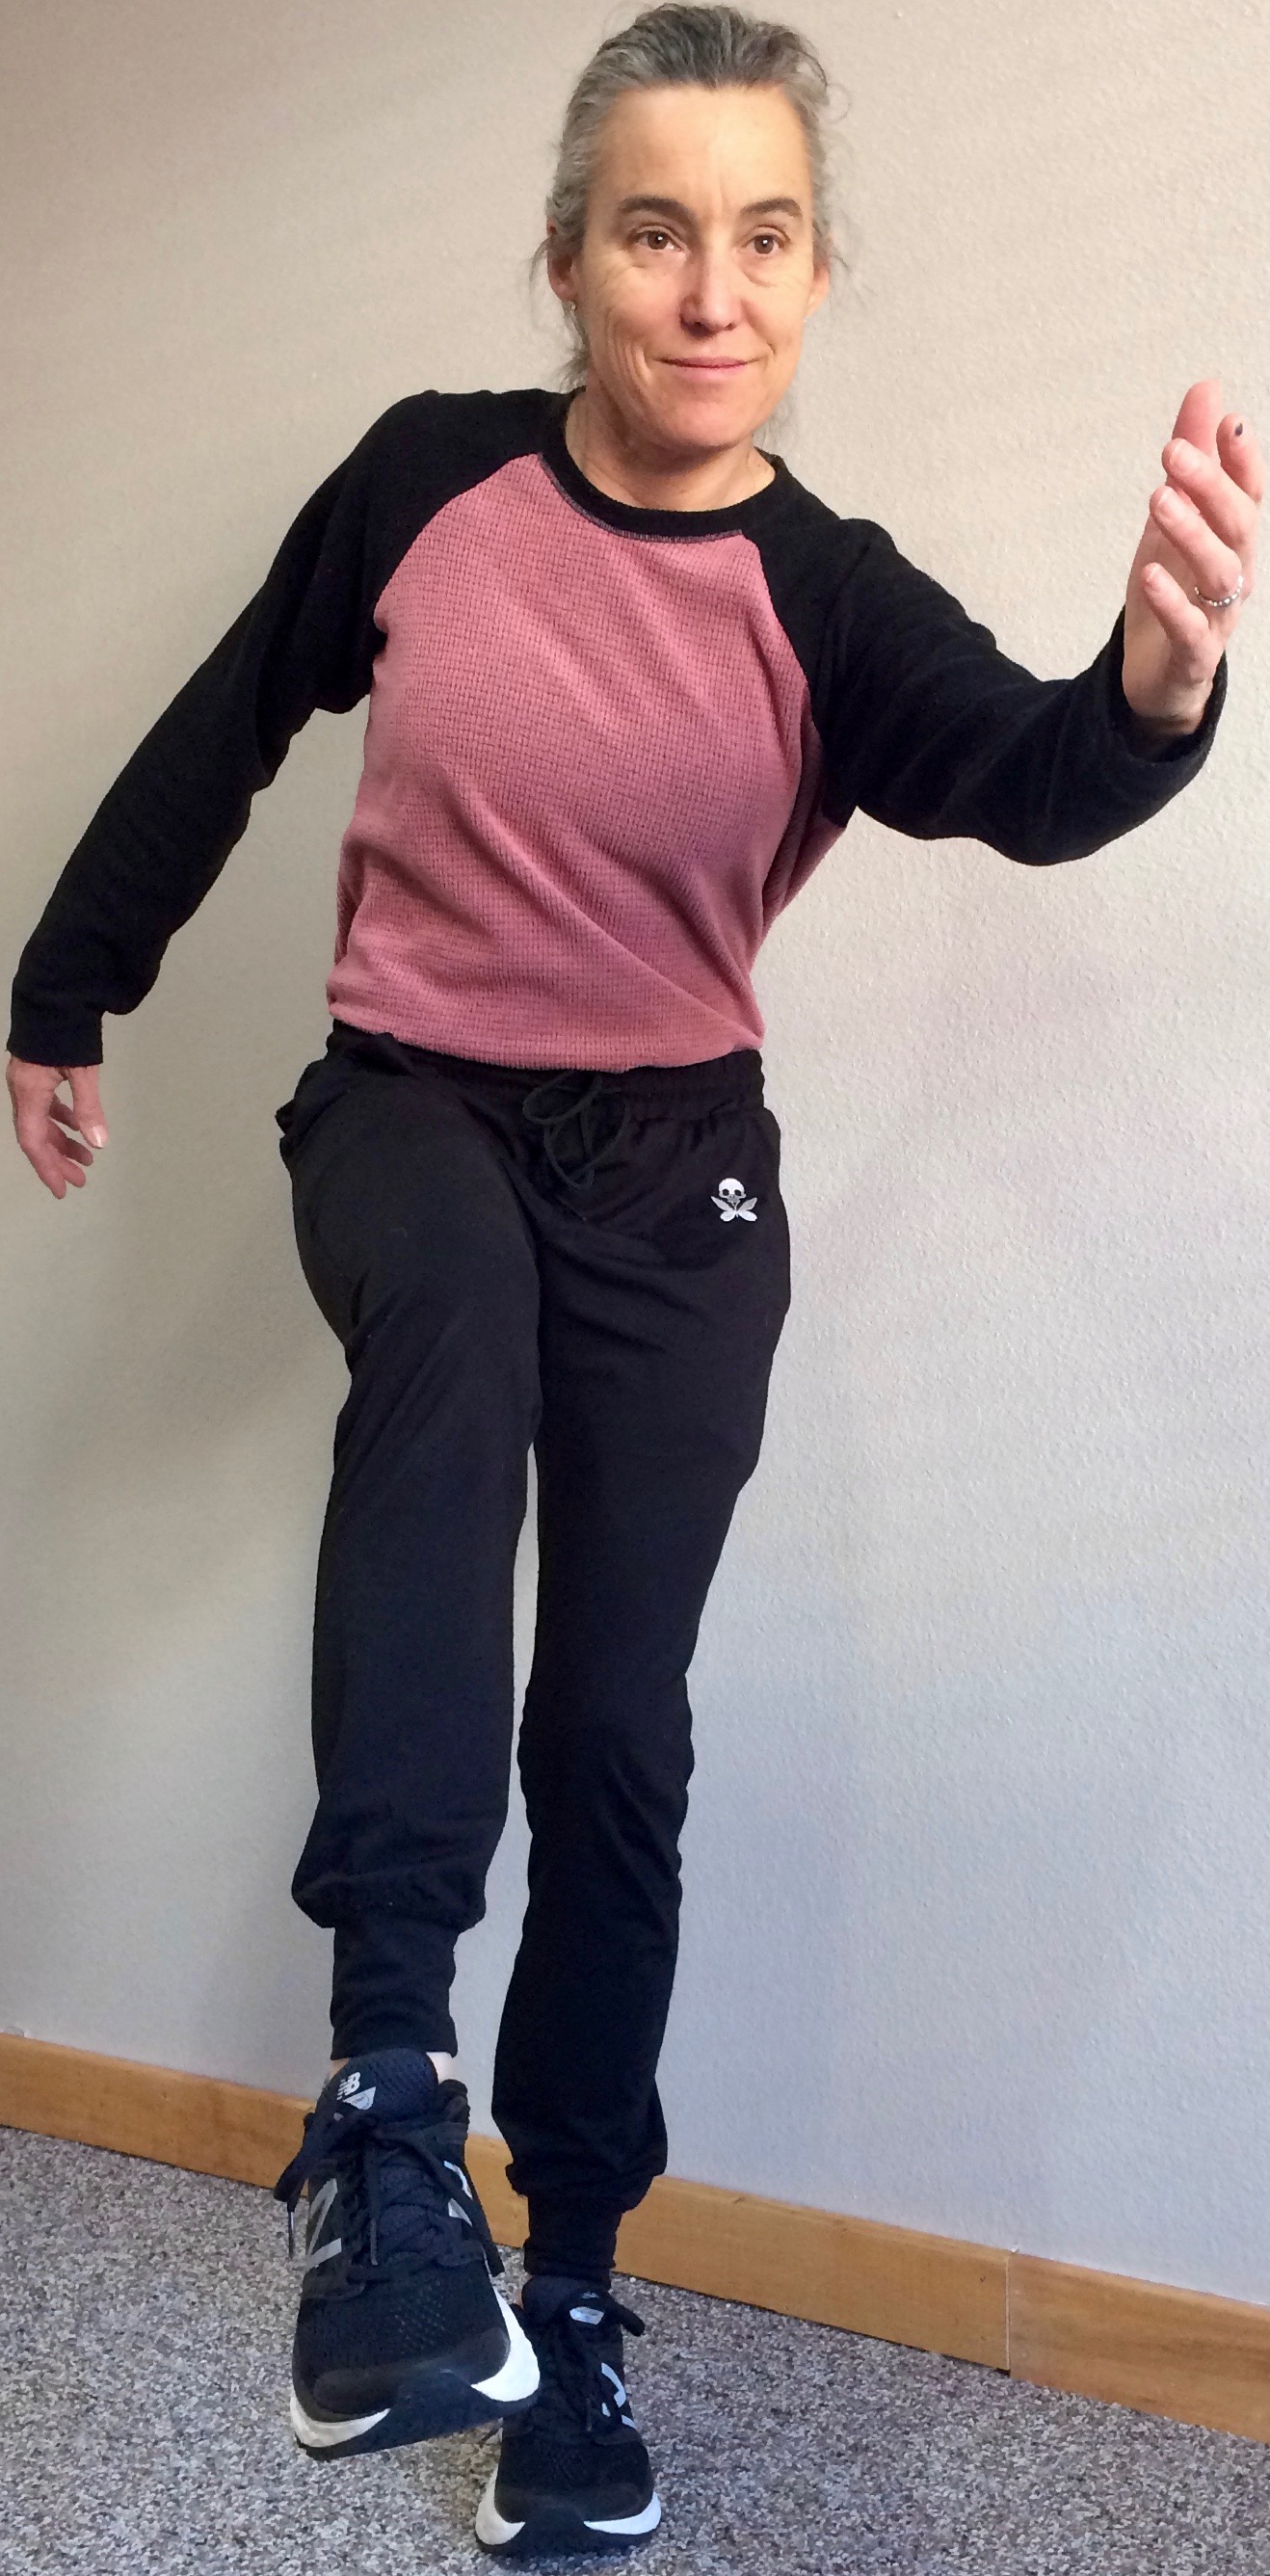
Exercise Progressions: Balanced Centering
Once you are able to integrate this position with correct muscle engagement, it is time to make it more functional and similar to running. Running is a one-legged activity! Therefore, you need to be able to do this with one leg off the ground and with movement.
- While in your centered position, lift one leg.
- Squat up and down in the centered position on one leg.
- Swing your arms, while maintaining your pelvic position.
Practice one-legged centering daily and watch your running improve.
Have questions? Contact me.
Stay connected with news and updates!
Join our mailing list to receive the latest news and updates from me.
Don't worry, your information will not be shared.
We hate SPAM. We will never sell your information, for any reason.