
3 Exercises for Better Upper Body Posture
Mar 19, 2016
Are you afraid of having a rounded upper body that makes you look and feel old?
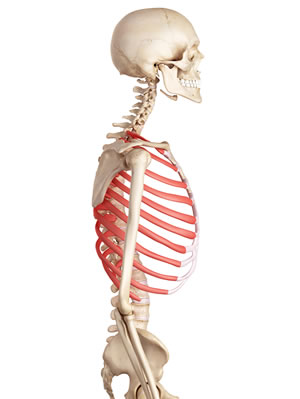 This seems to be the number one postural concern of my clients and class participants. But let’s not forget that your mid-spine is supposed to curve forward. In the image to the right, notice the curve in the spine where the rib cage attaches and shoulder blades (scapula) are located. We need that forward rounding for efficient, pain free functioning.
In our efforts to not look slumped forward, however, many of us have been inadvertently trying to straighten out this section of the spine through exercise. In order to fix this, we have been pinching our shoulder blades together with great enthusiasm, and liking the postural shifts in the shoulder and upper back position. However, it comes at a cost. We are not appreciating the negative consequences to the rest of our structure. Sure, you may appear straighter with your shoulders back, but how’s your lower back and neck strain? If you change the optimal position of the middle section of the spine, the upper and lower portions will be negatively impacted, altering to more exaggerated curves. It’s all connected!
When talking about proper upper body position in the thorax region of the body--neck to abdomen--there are two key players, which I’ve already mentioned: the scapula and the rib cage. And there are two types of motion regarding the scapula and rib cage. You can either move your scapula over your rib cage or thorax--Scapulo-Thoracic motion (ST)--or you can move your rib cage beneath your scapula--Thoracic-Scapular motion (TS). You may be less familiar with TS motion. I certainly was.
Let me explain. For years, in my own therapy and with my clients and students, I focused on ST motion, diligently moving scapula atop the thorax by pulling the shoulder blades down and together. Admittedly, I didn't pay much attention to the position of the rib cage below, nor did I consider that it could or even needed to move. But of course it can move. It is held in place by the soft tissues that are adaptable. But, sometimes, we don’t recognize that, since the rib cage seems like a fixed and immobile area of the body.
Comparing the size and space occupied by the bones of the scapula and rib cage, which might be more important in positioning the upper body?
If you answered rib cage, you are correct! Therefore, my original approach to repositioning the upper body was incomplete. Although ST motion is needed, TS motion is more crucial. Michael Cantrell, MPT, PRC and expert Postural Restoration Institute® (PRI) instructor explains: “Activation of Scapular-Thoracic (ST) musculature without first (or simultaneous) accounting for proper positioning of the Thorax under the Scapulae (TS) is folly since the results would produce neither proper positioning of the scapulae nor the ability to maintain proper positioning of the scapulae if any repositioning occurred.”i In other words, the scapula need the support of a well-positioned thorax below to maintain their alignment and function. Thus, we need to keep the forward rounding in our mid-spine with a well positioned rib cage to align the upper body. In order to do this, try the following three exercises. They provide the tools to achieve this result.
3 PRI Thoracic-Scapular (TS) Exercises
1. Supine Weighted Scapula Protraction
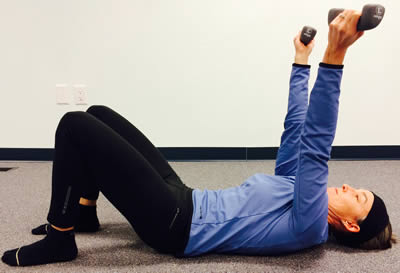
First, lie on your back. Now, as you exhale, push your heels into the floor and tilt your pelvis up so your tailbone is off the ground and lower back is flat. While you do this, you should feel your hamstrings and abdominals tighten as you bring your rib cage down in front. Also, notice that your abs are helping to hold your rib cage in position. Next, with small weights or cans of soup in your hands, push your arms straight up and turn your thumbs out. When you do this, your shoulders will come off the ground, and your neck will increase its curve. Feel the muscles around your shoulder blades and between your rib cage and scapula working. While holding this position, breathe in through your nose and out through your mouth five times. Repeat for a total of 3-5 sets.
2. Modified All Four Belly Lift
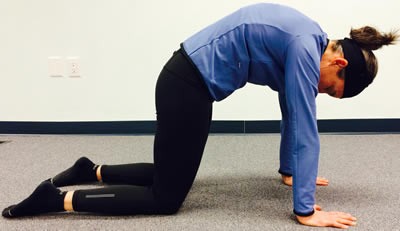
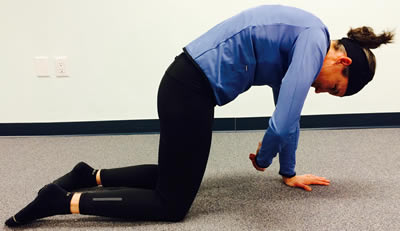
First, start on your hands and knees. Your hips should be directly over your knees and shoulders aligned with your wrists. Bring your nose so that it is in line with your fingertips. Tuck your pelvis under so that your back rounds. You should feel your abdominals engage and lower back lengthen. Hold this contraction for the duration of the exercise. Now, push your hands firmly into the floor, feeling the muscles between your rib cage and shoulder blades engage. You are bringing the front of your rib cage down while moving the back of rib cage up, into your shoulder blades. Next, pick up one hand--without losing your position because of inadvertent twisting or collapsing in the upper body. You should feel a stronger contraction in the abs on the side with your hand still on the ground. Breathe into your back and sides, in through your nose and out through your mouth, for 4-5 breaths. Then switch hands. If this is too challenging, or if you lose form, do the breaths in the starting position with both hands on the ground. (I always do one set in the starting position when I begin.) Continue for a total of 3-5 sets. As you get stronger, add more more breaths per set.
3. Standing Wall Supported Reach
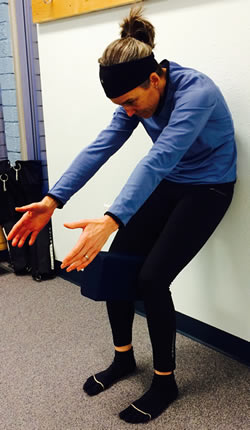
Stand approximately 7-10 inches from the wall with a 4-6” block or small ball between your knees. Place your back on the wall and extend your arms out in front of you. Bend your knees slightly while squeezing in with your knees and maintaining weight in your heels. Inhale without letting your upper body lift. You want to direct the air into your back.
Now, as you exhale, reach forward with your hands. Allow your upper back to move off the wall. You want to keep your lower back, belt line to bra line, on the wall. You will reach farther forward with each exhalation for a total of 5 breaths. If you feel your neck engage, lower the angle of your arms. You want the muscular effort coming from your back. Relax between sets, doing a total of 3-5. When I do this exercise, I also think of reaching forward with my knees and pushing my mid-spine up and back towards the wall. It is not uncommon to have lots of shifting--cracking and popping--in your upper back as you straighten up from this exercise. It should decrease with additional repetitions.
i. A PRI Analytical Overview Of Functional Thoracic Positioning and Thoracic-Scapular Stability (pdf)
Stay connected with news and updates!
Join our mailing list to receive the latest news and updates from me.
Don't worry, your information will not be shared.
We hate SPAM. We will never sell your information, for any reason.