
Home Office Setup and Workday Exercises
May 19, 2020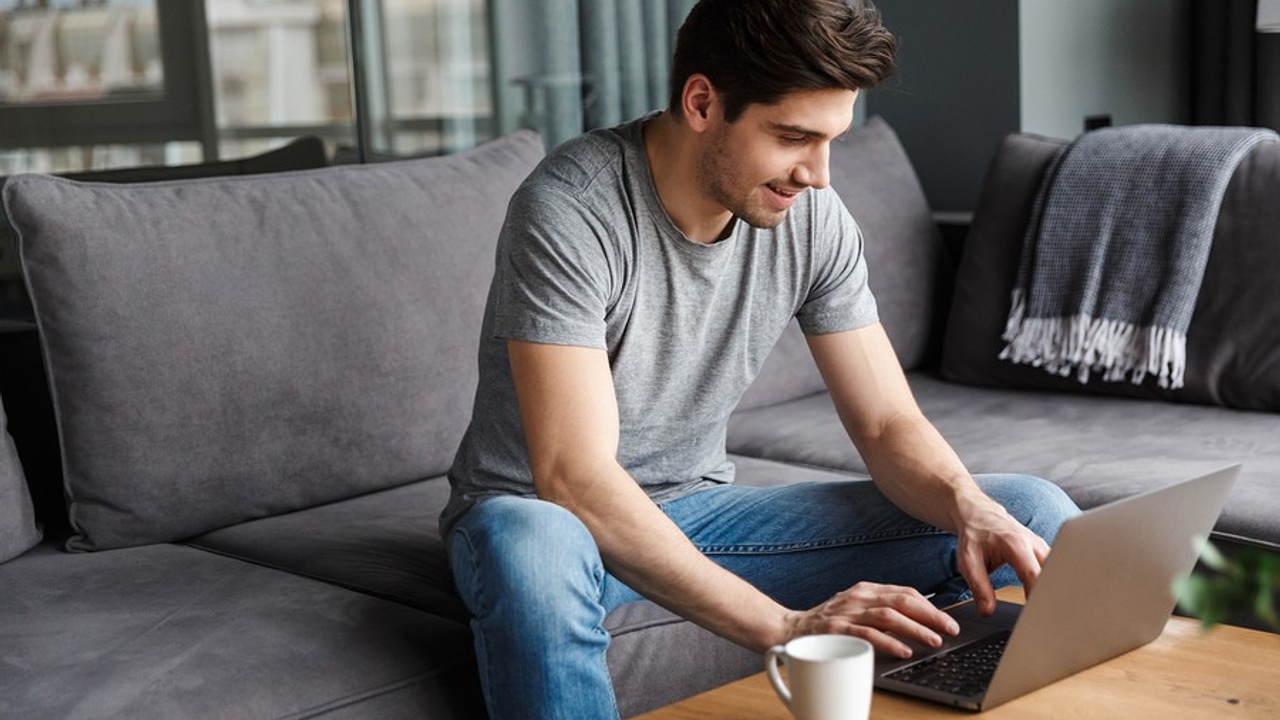
Admit it! You’ve done this, or sat in a similar position, while working at home recently. I know I have.
In the last couple of months, everything has become virtual--classes, meetings, family get-togethers, workshops, even happy hours. We are spending more time than ever at our computers. Because many of us never planned on being online so much and working long hours at home without an appropriate space to do so, we sit, hunching over our screens for hours in poor posture.
Setting Up Your Laptop
Laptops cause a real ergonomic challenge. If you place the keyboard in the position for your elbows to bend at 90 degrees (meaning, there's a straight line down from the shoulder to elbow), the screen is way too low.
Instead, the screen should be positioned so that when looking straight ahead, your eyes are in line with the top third to quarter of the monitor. How do you know the screen is at the right height? Check to see if you have to move your head up and down to see everything on the display. If not, it's correct. In other words, position the screen with your eyes lined up with the top portion of the display. This prevents you from tilting your head up and extending your neck to see the top of the monitor. If it's done correctly, you should be able to just move your eyes to see everything at the bottom of the screen.
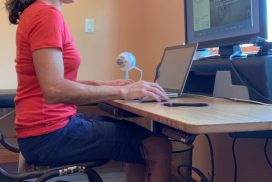
In order to achieve the correct position for your arms and for your eyes, the laptop keyboard and screen need to be separated. In my setup above, I have an external monitor. I am using the laptop as my keyboard only while keeping my working documents on the higher monitor.
Another way to achieve this result is to have a separate keyboard and use your laptop as the monitor only. One solution is to buy a laptop stand. However, you probably have something at home that can elevate your laptop screen. I am using a Reebok step for my monitor, but books and boxes work just fine, too. In this scenario you will also want an external mouse to keep at the same level as the keyboard. I also have a wireless mouse, although it is not essential.
Additionally, you’ll notice that I am not using the back of my chair; it has no arm rests; and my seat is hard wood. I prefer a simple chair like this that gives me feedback about my position. For example, I can feel my sit bones, at the bottom of my pelvis, which should be pointing straight down when I am aligned above--hips to shoulders stacked. Also, my knees are slightly lower than my hips and are vertically aligned with my ankles. My feet are pointing straight ahead. Finally, having a simple, not overly comfortable chair like this reminds me to move and change positions often as I describe next.
Move it!
Since your home office setup probably isn’t ideal, the best thing to do is move and change positions often. During my time as a worksite ergonomist, I often advised employees to install a friendly program called Stretch Break, which would remind them to move on a regular time interval of their choosing. Although this worked for some people, by far the majority of employees clicked “ignore” every time the annoying icon popped up to lead them through stretches. Eventually, they disabled the program entirely. Unfortunately, despite having control over the timing of the program--every 30 minutes, for example--the announcement often came at inopportune times, like when the employee was focused on a complex assignment, engaging with a colleague, or on a conference call and wasn’t able to step away from work.
What's more effective is to tie movement breaks or position changes to tasks. This is also helpful for productivity. At home you likely have a few different places you can work. And some tasks don’t need a “formal” space where you are using your computer. Coordinating your breaks with natural shifts in your focus and energy allows you to honor when your brain or your body position need a change.
A few suggestions: Consider sitting at your desk or table when doing tasks that require deep concentration--writing, analyzing data, crunches numbers, etc. Then, when answering email, you could move your computer to the kitchen counter and stand. Need to take a phone call? Put in your ear phones and walk around the house, or even go outside. Attending an online class or meeting? Turn your camera off (if you can) and recline in static back or constructive rest position (https://thepfathlete.com/the-best-position-to-relieve-back-pain/).
When you connect positions with tasks, your body and brain creates a pattern between these things. In the above example, when sitting at your table, your brain and body recognize that you are doing more focused work and not surfing the web or checking email. Since it's often more difficult to be productive away from the structure of the office environment, try creating these patterns. You might find your productivity soaring!
3 Workday Exercises
If you perform regular exercises that move the body in the opposite directions of our working postures throughout the work day, you can decrease the accumulation of pain-causing stress and tension in your tissues and joints. Since you will be at home doing these exercises, I chose ones that get you up out of your seat, which can be harder to do at the worksite. To be effective I recommend that you do the exercises in the order presented. These can be done multiple times throughout your workday.
Chair Hip Flexor Stretch
While sitting at the computer, the muscles that flex the hip on the front of the body can become short and tight, resulting in an anterior tilt of the pelvis and tightness in the lower back. For more information on anterior pelvic tilt, read 5 Exercises to Reduce Anterior Pelvic Tilt.
 First, stand to the side of your chair and place one foot on the seat of it. Hold the back for balance if you need to. Be sure both feet are pointed straight ahead.
- Next, tighten the thigh of the leg with the foot on the ground by pushing your knee back to straighten your leg. You should feel your knee cap move up.
- Tuck your pelvis under to increase the length in the front of your hip. In this picture, I am stretching my left hip flexors.
- To increase the stretch, lean your whole body forward from the ankle while increasing the bend of your knee on the chair. Maintain the straight alignment of the body from the foot and ankle on the floor all the way up to the ear and head.
- Re-tuck the pelvis after moving forward.
- At this time, check to make sure your pelvis is oriented straight ahead without rotation to the right or left.
- Breathe into your diaphragm, all the way around your body, and visualize the front of the hip opening and lengthening as you stay in the position.
- Hold for a minimum of one minute before switching sides.
Standing Wall Twist
This exercise works on hip mobility through rotation integrated with upper body opening. This counters our tendency to round forward while working.
- To begin, stand next to the wall about one foot away. Bring your outside f
 oot forward and inline with your back foot, like you are on a balance beam. Your feet should be about a foot apart from the heel of the front foot to the toes of the back foot. Both feet should be pointing straight ahead.
 - Rotate your upper body toward the wall. Then, place your hands wide apart and about shoulder level on the wall. Try to get your palms and fingers flat on the wall.
- Tighten both thighs by pushing your knees back to straighten your legs. You should feel your kneecaps move up.
- Now, rotate your head to look behind you.
- Pull your shoulder blade--the one you are looking toward, my right in this picture--down and in toward your spine. This will increase the rotation through your torso. You should feel the muscles between your shoulder blade and spine tighten. Avoid lifting the shoulders and feeling tension on the top of your shoulders or through your neck. If you feel this, lower your arms and reduce the intensity of the muscular contraction, bringing your shoulder blade down and in.
- Evenly weight both feet. (There is a tendency to have more weight in the back foot.) Keep your feet flat without rolling in or out.
- Breathe into your diaphragm, all the way around your body. Then, as you exhale through your mouth, strive to gently increase your rotation.
- Hold for a minimum of one minute before switching sides.
Counter Stretch Wall
This final exercise stretches the back of the body and helps to balance the pelvis before you continue working.
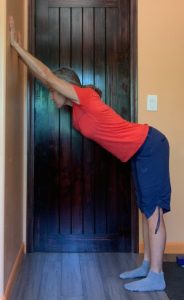
- Start this exercise by standing and facing the wall. Place your feet hip-width apart and pointing straight ahead.
- Next, extend your arms overhead and place your hands on the walls. Be sure your palms and fingers are flat against the wall.
- Now, walk your feet back, away from the wall, as you push your hips back and lengthen through your torso and spine. Your hips and ankles should be in vertical alignment.
- Tighten both thighs by pushing your knees back to straighten your legs. You should feel your kneecaps move up.
- At this time, drop your chest down through your arms, keeping your elbows straight. Allow your shoulder blades to slide down and together, all the way to touch if you can. Your hands may slide down the wall slightly as you find your position.
- Be sure to keep your head neutral with your ear near your upper arm. Breathe deeply as you sink into this stretch.
- Hold for a minimum of one minute.
Virtual Home Office Ergo Eval
Wondering how to improve your home office setup? Contact me to discuss.
Stay connected with news and updates!
Join our mailing list to receive the latest news and updates from me.
Don't worry, your information will not be shared.
We hate SPAM. We will never sell your information, for any reason.