
5 Posture Exercises to Build Your Bones
Jul 30, 2014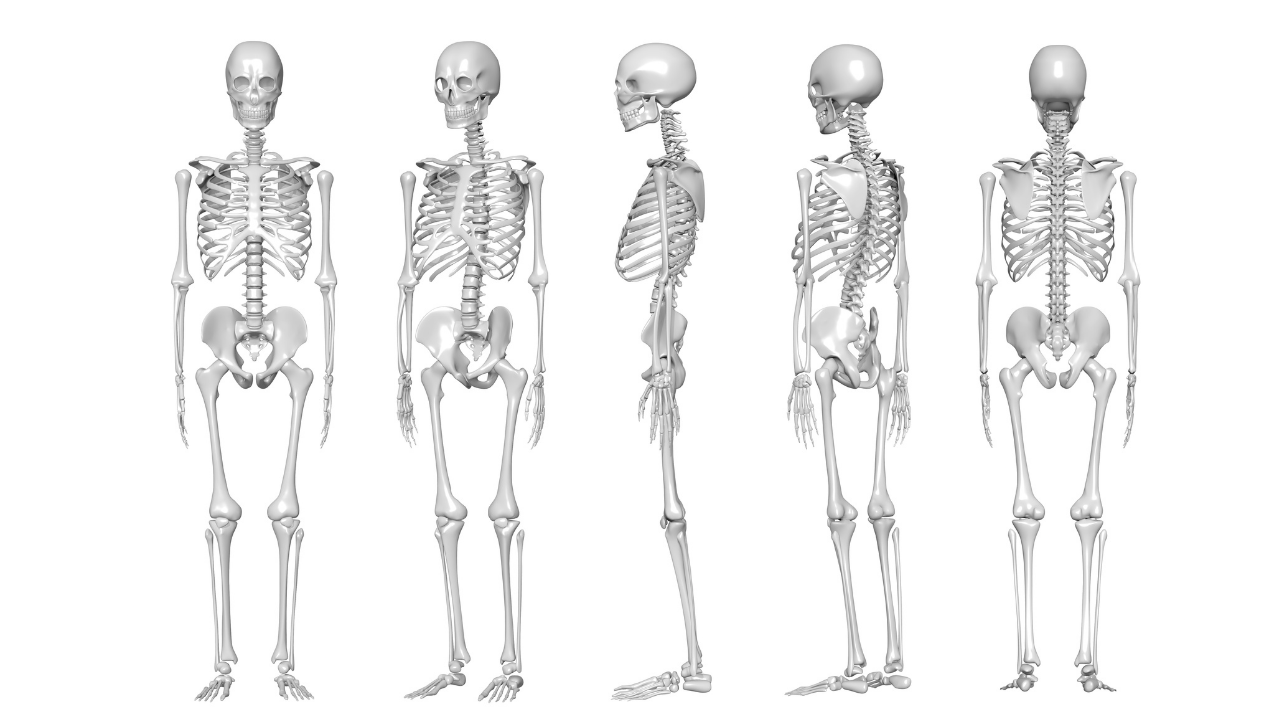
In my last blog, Prevent Osteoporosis with Aligned Posture, I proposed that aligned posture or the lack of it is a risk factor for osteoporosis. When your skeleton is not stacked vertically against gravity, your bones are not being stimulated to grow. As a result, your bone density diminishes.
The hips, spine and wrists are the most common sites of fracture due to osteoporosis. In order to strengthen these areas, try the following posture exercises. They address whole body alignment with special emphasis on these specific areas of the body.
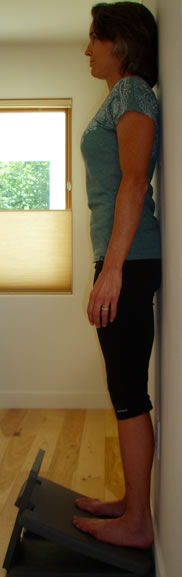
This exercise puts the load-bearing joints - ankles, knees, hips and shoulders - in alignment with each other. Your proprioception (body’s ability to know where it is in space) for proper posture is also enhanced.
To start, stand with your back to the wall on a slant board. (If you'd like, you can construct a slant board by stacking books and placing a cutting board or similar flat board between the books and the wall. Alternately, you can use a step stool, although this is not ideal since your heels are not supported and force is not transmitted up the body.) While in position, keep your feet straight and hip-width apart. Also, be sure your knees are extended, not locked. Your butt and upper back should be on the wall. And, your head may also be against the wall. However, do not force your head to the wall, as this will over extend your neck. Now, stand in this position for up to 5 minutes.
2. Forearm Stretch
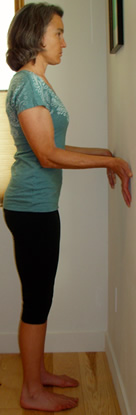 Instead of taking a standing aligned posture, which you did in the last exercise, this exercise takes you off the wall. As a result, without the feedback and support of the wall, you will learn how to hold correct posture in a free-standing position. It also repositions the shoulders, elbows and wrists.
First, stand facing the wall about six inches away in straight alignment with your load bearing joints (ankles, knees, hips and shoulders) stacked vertically. Then, place your hands on the wall with your fingers pointing straight down. Now, push your palms into the wall to feel a stretch in your forearms. While doing this, keep your elbows close to your sides and shoulders retracted down and together. Hold this position for 1-2 minutes.
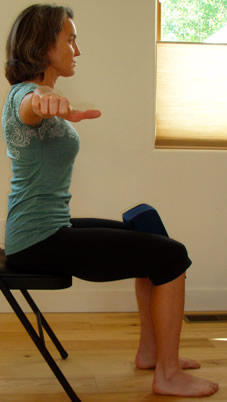
The next exercise, the sitting position, puts more force on the hips and spine than standing. When sitting, you only have two of your four load-bearing joints available: the hips and shoulders. The ankles and knees are no longer available for support. If you raise your arms up and out, you'll further increase the demand on the hips, pelvis and spine. Combined with upper body movement, you'll further challenge the stability of these joints.

To begin, sit on the edge of a chair with the lower body at a ninety-degree angle and a pillow between your knees. The pillow is for alignment. Now, squeeze gently and hold. The hips should be at the same level as the knees or slightly higher. Also, the hips and shoulders should be stacked vertically. If you're in correct position, the spine is in neutral alignment with an arch in the lower back and neck and slight rounding in the mid-back. Next, bend your fingers into your palm to activate your forearm muscles, which aligns and locks out your wrist.
Now, extend your arms straight out from your shoulders without engaging your neck muscles. At this point, you may need to lower your arms to reduce neck activation. Then, pinch your shoulder blades down and together, and hold this contraction throughout the exercise. Next, with your thumbs pointing forward, circle your arms forward, going in front and behind the body. Complete 20-40 circles. When you've completed these circles, change it up. Rotate the thumbs back so that your palms are up and circle backwards 20-40 times.
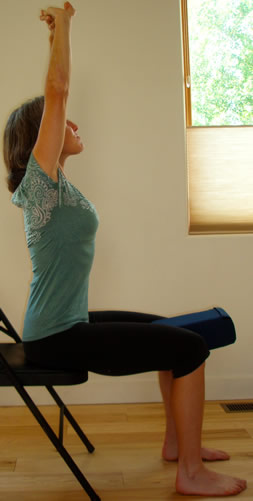 When you raise the hands above the head, you increase the forces placed upon the alignment of the upper body.
Start in a seated position. From this seated position, as described above, interlace your fingers, straighten your elbows, and extend your arms overhead. The movement comes from the upper back and shoulders. In other words, do not exaggerate the arch in your lower back or shift your body forward. Now, hold this position for 1 minute.
5. Sit to Stand with Pillow
When you add movement, you'll increase the demand on the hips, spine and pelvis, which stimulates greater bone growth.
While you're still sitting, place your hands behind your head, and then pinch your shoulder blades down and together. Now, push down through your feet and straighten your knees to come to a standing position. Limit how much you lean forward with the upper body while moving up to standing. Really focus on keeping the elbows back and using your legs.
Now that you're standing, move your butt back first, keeping the upper body lifted, and finally lower yourself down to the chair. However, only lightly contact the chair--don’t sit with all your weight. Then start the next repetition. Repeat 10 times. As you get stronger, add more sets of 10 up to 3.
 |
 |
 |
In order to improve your posture and thus increase bone density, perform these exercises three or more times a week in the order presented. If you have questions, please contact me.
Stay connected with news and updates!
Join our mailing list to receive the latest news and updates from me.
Don't worry, your information will not be shared.
We hate SPAM. We will never sell your information, for any reason.